Photoshop has got lots of powerful tools that assist to edit an image seamlessly. The Pen Tool is one of those powerful tools that is used for making clipping path. The special feature of this tool is you can separate anything from its previous background by making a selection. The clipping path technique is beneficial for product photography.
Getting excited about performing this image editing technique? You’re warmly welcome. Within a few minutes, you will learn how to make a Clipping Path in Photoshop like a professional designer.
Let’s move forward and follow our step-by-step guidelines about the Clipping path.
Step 1: Drag Your Image On Photoshop
To start the procedure, you have to start with dragging your picture on Photoshop. You can also open the image from the “File” option placed at the top. However, we are going to work on this image.

After opening the image, you have to click on the shown icon to unlock the layer. It will enable transparency for the layer. Have you unlocked it? Okay, jump on the 2nd step.
Step 2: Picking The Pen Tool
In this stage, we have to choose the pen tool so that we can make a clipping path with it. New designers may get confused about finding the tool. You’ll get it here.
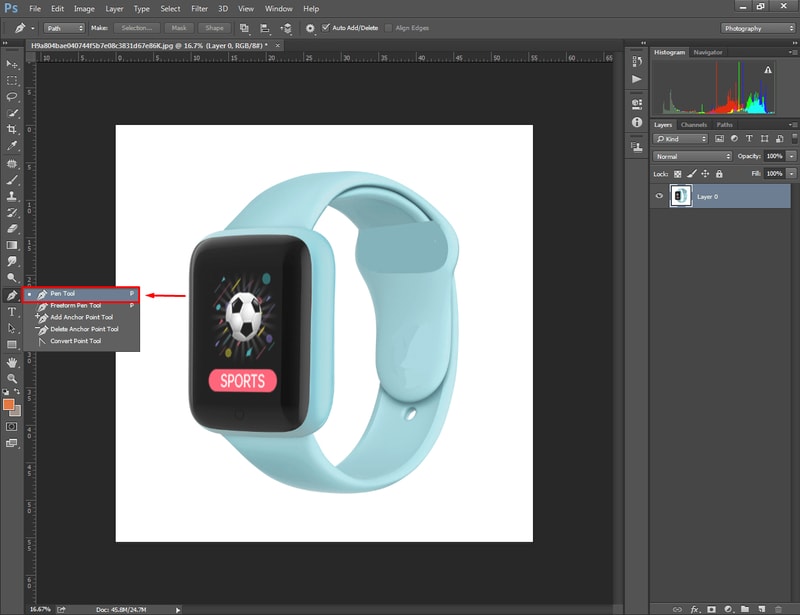
Simply, you have to click on the tool and it will be selected. There will be another option, “Freedom pen tool”. We’re going to work with the first one. Now, we need to move to the 3rd step.
Step 3: Make A Clipping Path In Photoshop
Before we start making a path, let me tell you about how it works. Basically, we need to create vector lines around the watch to make a selection. Later on, we’ll separate those selection areas and remove the image background. Let’s do it. You can zoom on the image by pressing “CTRL and +” together.
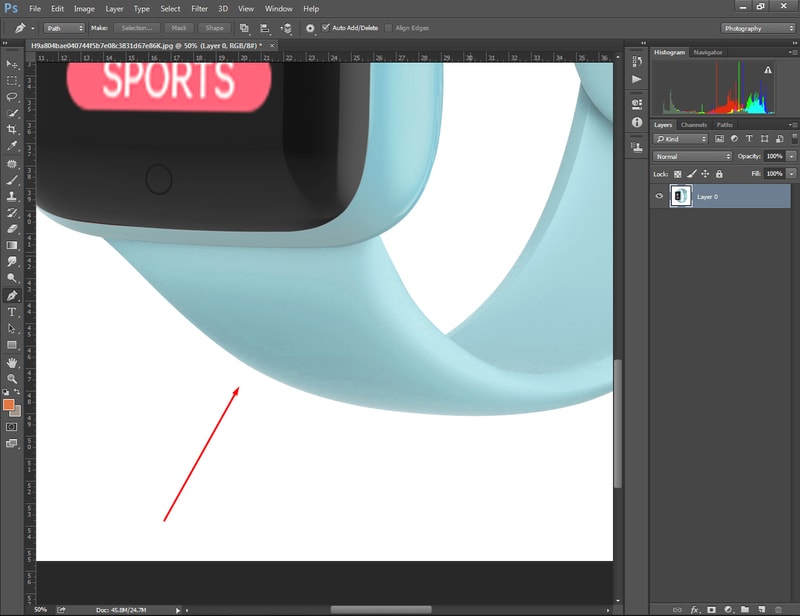
To zoom out, you have to press “CTRL and -” together. You can start making a clipping path in Photoshop from the bottom part of your product. It seems to be easier in that way. How to make anchor points? You just need to click the right mouse on the object’s outer line. It will create a vector line from one anchor point to another. Here’s the direction.
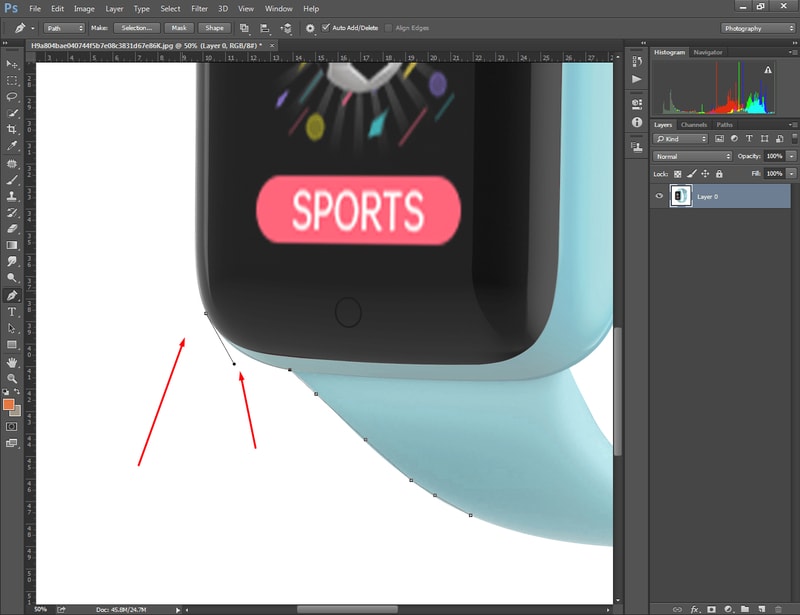
In some areas, there might be a curved shape in your object. Press and hold your mouse then move it to the suitable direction to bend the vector line. You can also use the “ALT” key to change the direction of the line. Ultimately, you have to join the final anchor point to the starting point.
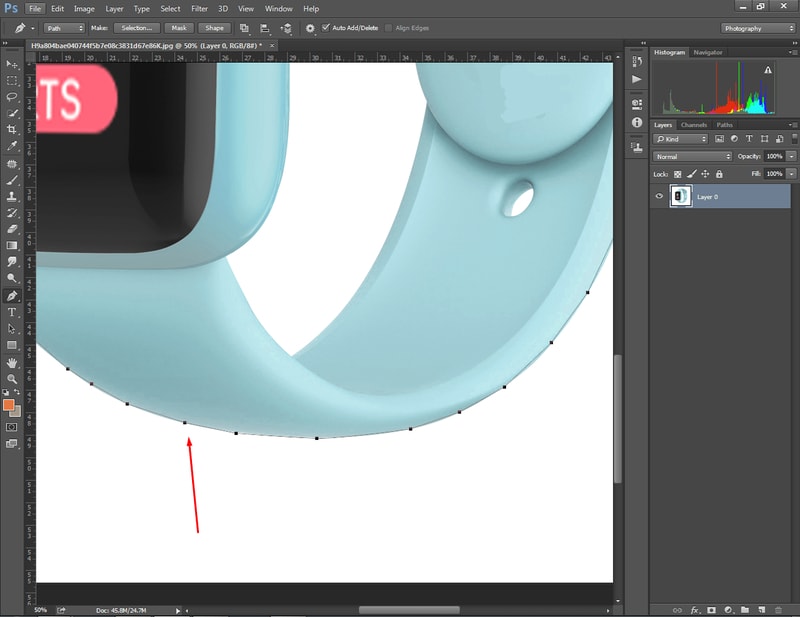
At this point, we have got our object covered with vector lines. But, we also need to make a clipping path for the inner background that we want to remove.
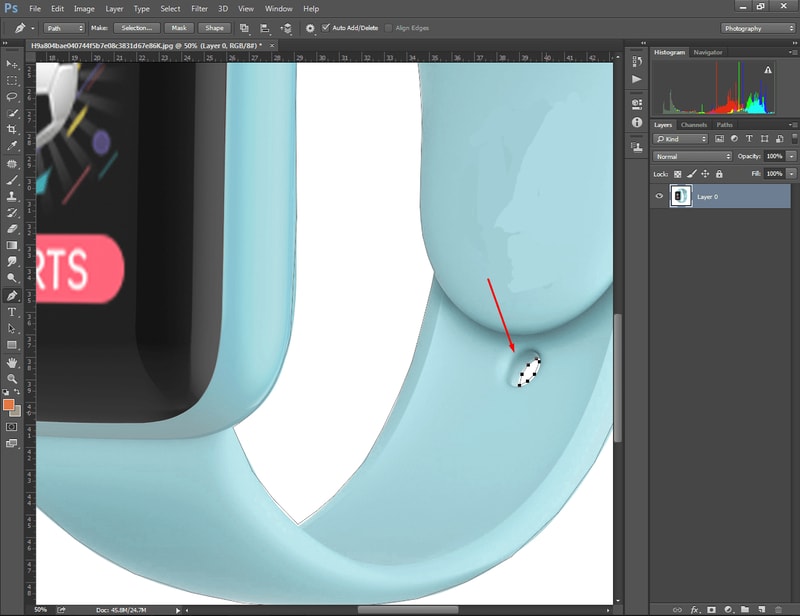
Following the above instruction, you have to create anchor points for the inner portion too. Do you want to keep something from the background? Then, you have to exclude the portion from the selection.
Now, let’s move to the next step.
Step 4: Turns Vector Lines Into Selection
Hopefully, you have to cover your object with vector lines. You have to turn the vector lines into selections. That’s going to be an easy process. Hold the “CTRL” key and drag your mouse over your product. It will make all anchor points visible. Just click on the right key and press on “Make selection”.
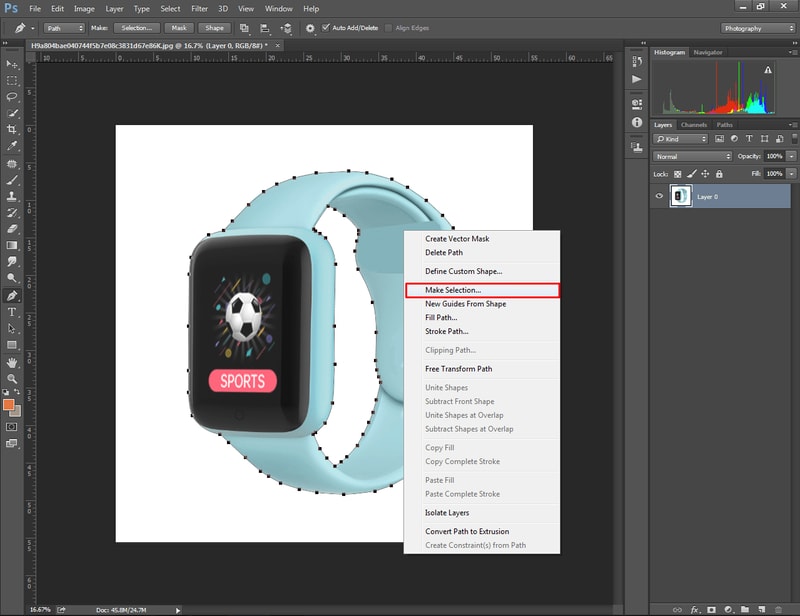
After that, you should go to the “select” option from the top and click on the “Inverse”. Now, it will make the opposite selection. We are only one step away from getting the final output.
Step 5: Remove Background & Save In Suitable Format
Finally, you can simply press the “Delete” key to remove the background. After that, you can deselect the object by pressing “CTRL + D”. It will hide the selection lines. Here you can see the result.
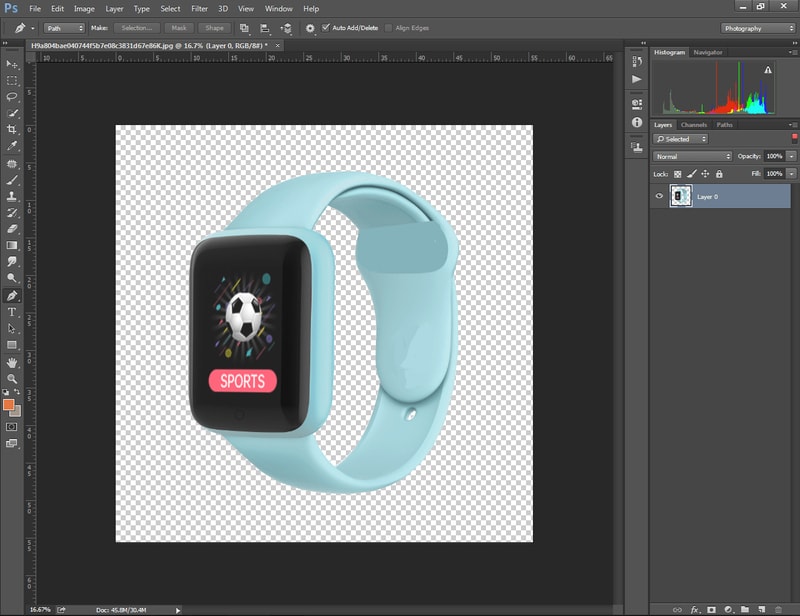
Our product image is ready to save. Go to the “File” option from the top and choose “Save As”. Then, it will find different types of file format options.
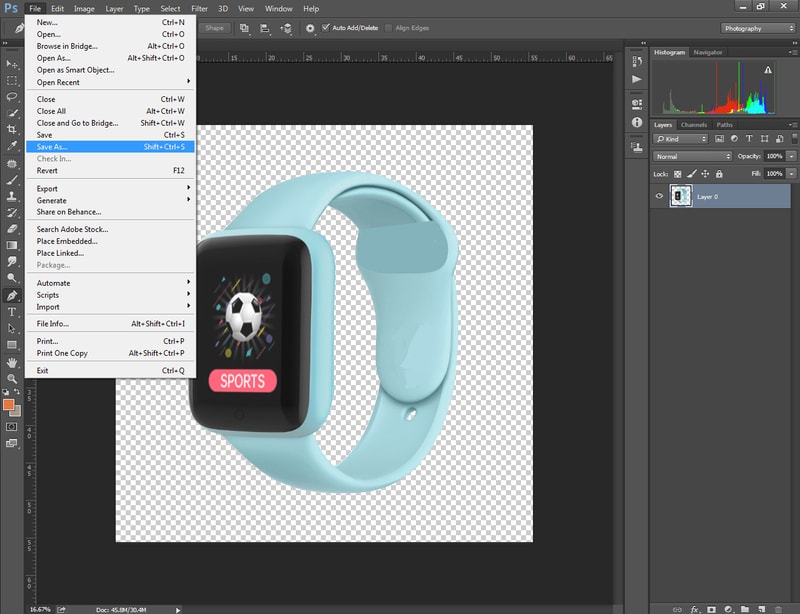
“PNG” is a suitable format for saving images having a transparent background.
Wrapping Up
That’s all about how to make a clipping path in Photoshop like a professional designer. Would you like to get assistance from highly experienced Photoshop designers? Request a quote now & try Clipping Path Service. You will get the best photo editing experience.
Frequently Asked Questions
Q: Which Version Of Photoshop Is Best For Making Clipping Path?
A: Most designers prefer Photoshop CC, CS 5 & CS 6 to make a clipping path.
Q: How Do I Save My Created Path In Photoshop?
A: You have to go to the Path section and double click on the “Work Path”.
Q: How Do I Deselect The Object After Creating A Path?
A: “CTRL + D” is the default deselect shortcut in Photoshop.
