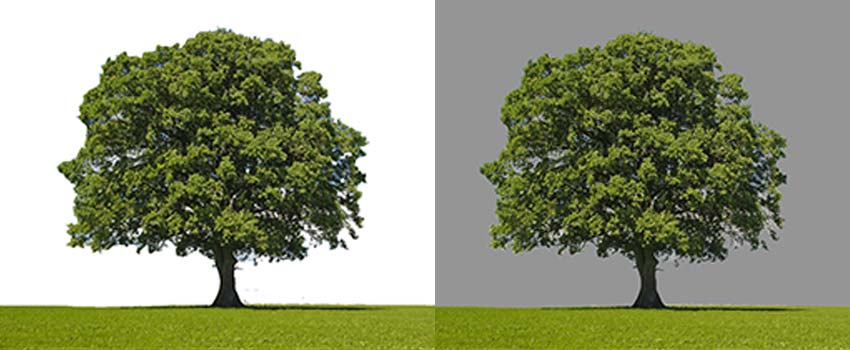
Easy Ways to Cut Out Images on Photoshop:
Learn How To Cut Out An Image In Photoshop, an easy step-by-step approach in cutting out images or part of images from existing ones using various selection tools on the Adobe Photoshop software. Perform various tasks such as changing the background of images, save part of an image as a new one or insert in a new image.
Characteristics of images such as texture, color composition, the identity of the image, and so on vary with images. Therefore, the choice of selection of design tool would depend solely on the above-stated characteristics.
Know More: How Much Ram Do I Need for best Photo Editing 2022?
Images with rough edges such as trees and human hair, different color compositions, sharp or straight edges all have the best adaptable tools to use in getting a professional and desirable result.
Easy Way to Use the Quick Selection Tool to Cut Out and Change the Background An Image
The sample image to be used as a practice here is an image with smooth edges, a music headset on a yellow background. We would attempt to cut out the music headset from the yellow background while the new background would be used. The ‘pen tool’ is the best tool to be used in cutting out the image in this scenario of the image having smooth edges. Other tools can as well be used, but the pen tool is preferred.
Step 1: How To Cut Out An Image In Photoshop
The first step in working on any image is to place the image on photoshop workspace either by opening the image directly or dragging it into the workspace from a folder.
Step 2
Make sure that the photoshop image is rasterized before working on it. Select the pen tool from the tool panel by the left of the worksheet as shown in the image below.
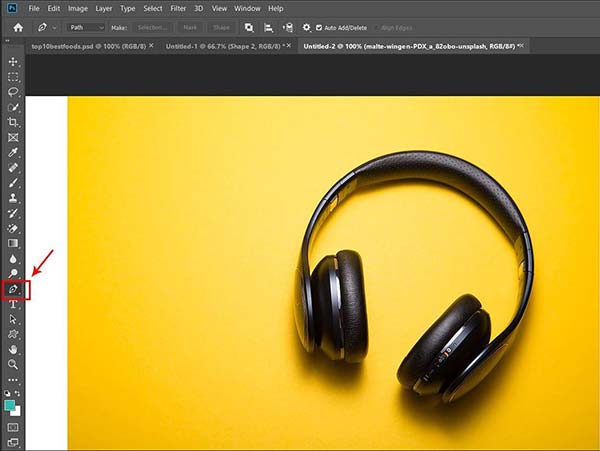
Make sure that the pen tool is set to ‘path’ instead of shape at the options panel above the worksheet. This would make the pen tool make selections instead of attempting to draw a shape. The next image shows how and where to change the pen tool function to ‘path’.

Step 3
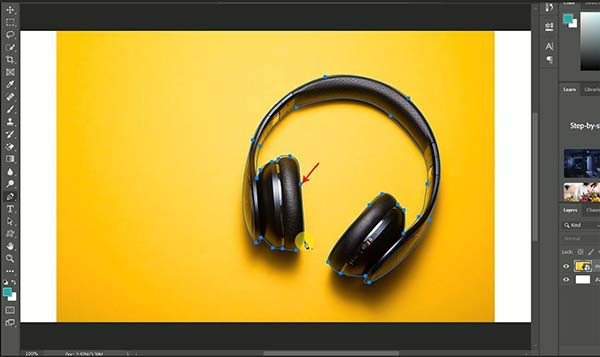
Begin by selecting the edges of the image to be cut out, the headphone in this case. Select the edges and draw curves were necessary to get a perfect selection for the object. Continue to select the points and edges until there is a closure. That is, you close your selection from the starting point and return to the starting point to give it closure. The cursor changes to a round symbol to show that the selection is about to be closed. The image below shows a complete selection of the headphone using the pen tool.
Step 4
What the pen tool does is trace the path of the edges of the part of the image to be cut out. To effect the selection, we press the ctrl + enter button on the keyboard for windows users and the command + enter button for mac OS users.
The highlighted path is then transformed into a dotted path.
Know More: How To Make A Clipping Path In Photoshop 2022
Step 5
The next step is to isolate the selected image by cutting it out. At the upper panel on the photoshop select layer then new, then select the layer via cut option. This would cut the headphone away from the background and put on a different layer as seen at the layer panel at the right side of the photoshop worksheet. You can choose to delete d remaining part of the image or hide the layer.
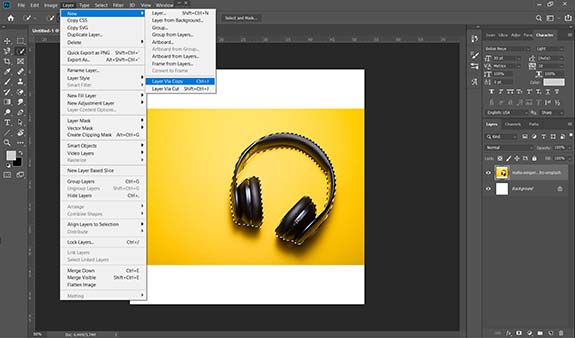
The image shown below shows the isolated headphone with no background as well as the former background layer hidden.
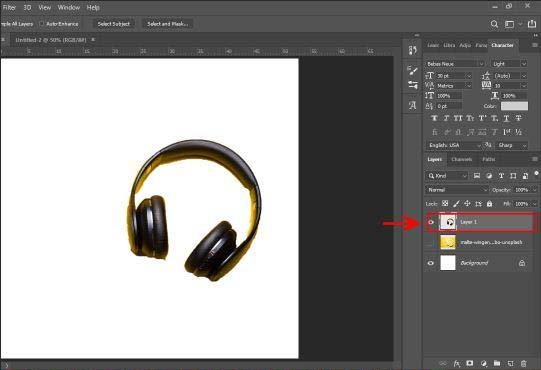
Step 6
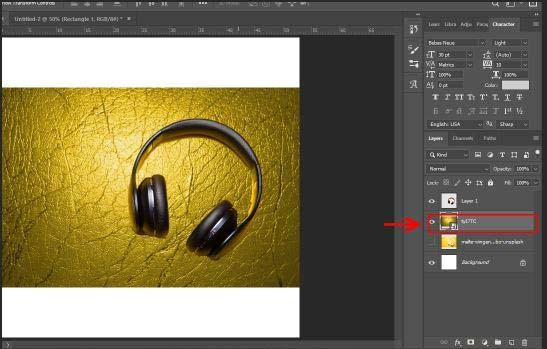
We might decide to leave the image like that or decide to insert a background of our choice. To insert the background, the image background is dragged into the photoshop worksheet or a custom background such as solid color or shape can be used. The background layer is indicated with the red arrow as shown in this image below. We have successfully cut out the image and placed it on a new background.
Cutting Out Part of an Image Using the Quick Selection Tool on Photoshop
In photography color and light are two important elements. Light varies with shade and composition.
A quick selection tool is an important tool for cutting out a part of an image. To use the quick selection tool, the part of the image to be isolated must have a different or varying color composition or type. This is so because the quick selection tool uses color difference for selection. In case the image to be cut off have a similar or same color with the background, the quick selection tool might have difficulty selecting the desired part as the background might be selected due to the similarity in the color.
Quick selection is also suitable when there are rough edges as it would also pick it so far there is color variation.
Step 1: How To Cut Out An Image In Photoshop
Select the ‘quick selection tool’ from the toolbar at the left panel of photoshop. Make sure to adjust the size of the tool appropriately from the top options panel. This is indicated with the red rectangle, this would define the area of coverage of the quick selection tool per click. The addition and subtraction sign beside the size can be used to select or deselect a particular portion.

Step 2
Click or swipe over the area to be cut off to select. The ‘+’ should appear while making the selection and if the area outside the portion has been marked, the selection has to be removed by clicking on the subtraction sign (‘-‘) at the top panel for deselecting portion or holding on to the alt key while making the selection.
Note that the quick selection can select portions separately. Note that the portion in between the shoulder and the hand should not be selected as it is not part of the desired portion. In case it is already selected, the deselect option ‘-’ can be used to isolate that portion. The delicate portion is indicated in the picture below.
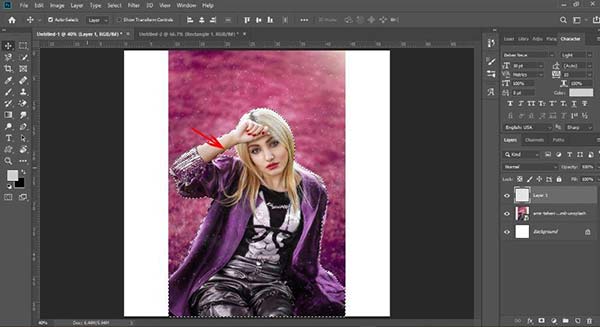
The brush size of the quick selection tool can be reduced for it to move through that small portion indicated by the red arrow.
Step 3
The next step is to cut the selected part of the image and isolate it in a different layer. This is done as shown in the first procedure by navigating to the upper panel on the photoshop, select layer then new, then select the layer via cut option. The remaining layer which is the old background can then be hidden or deleted as desired. This leaves us with the portion of the image with no background (or white background) as seen below.
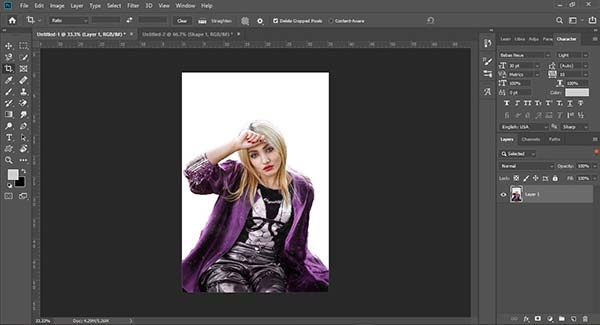
Step 4
The desired background can be inserted into the image or the image can be saved separately in its isolated form. We will attempt to insert a new background into the image to visualize the outcome of the whole process.
The new background is moved into the photoshop workspace by dragging it or opening it from the file menu. The outcome is seen in the image below.

Note that the size of the quick selection brush tool is very important in the smoothness of the portion to be cut out. For smaller portions of the image, the brush size of the quick selection tool has to be reduced so that the desired portion can be selected while the undesired portion can be eliminated appropriately. This would give a very smooth and clean edge image without noticing that the background was changed or the image was manipulated.
Easy Way to Remove Background Using the Color Range Technique in Photoshop
The color range technique is one of the fastest techniques in background elimination and cutting out of a part of an image. Color range technique in photoshop is commonly used in photography and photo manipulation to remove a part of an image with a distinct color or light composition.
Color range as the name implies would only be an easy way when dealing with a distinct color. The following steps will guide us through how to make use of this technique for background removal and cutting off of images.
The image selected has nearly just two color variations which would make this process an easy one.
Step 1: How To Cut Out An Image In Photoshop
Place the desired image in the photoshop worksheet by dragging or opening through the file menu. Also always make sure that the image is rasterized by going to the layer menu at the top panel and navigate to the rasterize option to rasterize the layer.
Step 2
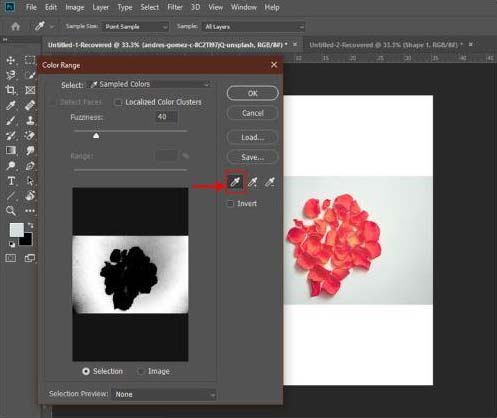
Navigate to the select menu at the top of the photoshop panel. And click on the color range. Select the color you wish to eliminate in this case, for this practice session the grey color Is to be eliminated.
From the panel that pops up after selecting the color range, make sure it is set to sampled colors from the top.
Three different eye dropper symbols would appear on the right side of the panel that pops up. The first one is used to select the portion to be eliminated, while the second and third eyedropper tool is used to add or remove the selection.
The fuzziness can be readjusted as desired to increase or reduce the depth of the color composition. This affects the range of color hence, the elimination of certain color ranges.
When the color is selected with the eyedropper tool, a preview is displayed on the panel to show the portion selected displayed in black color. This can be inverted as well by checking the invert box.
The drop panel is shown in the image below. Press the OK button when done.
Step 3
The portion clicked is automatically selected after pressing the Ok button on the pop-up panel. This selection can be inverted under the select menu on the top bar of the worksheet.
The next step is to cut out the part of the image that has automatically been selected by the color range technique and isolate it in a different layer. This is done by going to the upper panel on the photoshop, select layer then new, then select the layer via cut option.
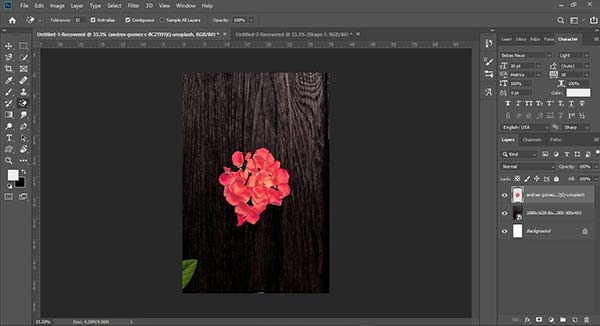
The result of the procedure is shown in the image below after a new background has been added to the existing image.
Cutting Out A Cloud Off A Tree Image Using the Magnetic Lasso Tool in Adobe Photoshop
The magnetic lasso tool is similar to the aforementioned tools as they all perform similar functions of selecting an image to cut it out or replace its existing background.
As the name implies, the magnetic lasso tool has a magnetic property that allows it to automatically attract itself to the edges of the portion of the image to be selected.
They all use similar methodologies of making use of color and lighting differences in images. These differences distinguish different portions of the image which makes these methods easy to use in photography and general photo manipulation using the photoshop software.
The lasso magnetic tool is best used on images with multiple curved edges or sharp edges at it automatically aligns itself to the edges of image paths.
Below are easy steps in using this magnetic tool.
Step 1
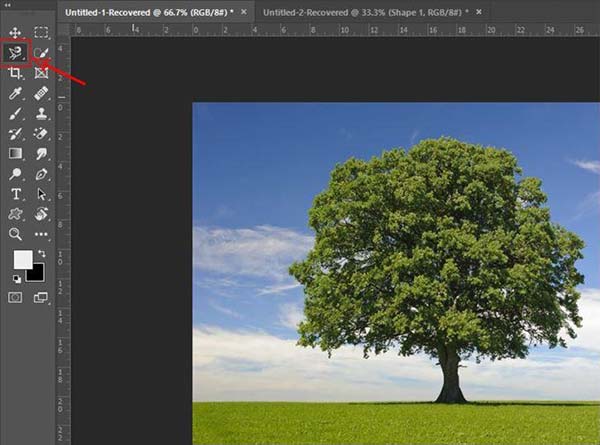
Place the image to be worked on inside the worksheet in the photoshop software, at the tool panel select the lasso magnetic tool
Step 2
Choose a starting point for selection and start by selecting the path of the unwanted portion which is the cloud in this case. Select carefully as the tool automatically magnetizes itself to the edges, in case of any mistake and you want to return a step backward, use the backspace on the keyboard to move backward, click as many times as you want it to move backward.
This tool is similar to using the pen tool as you have to give the selection a closure, that is you close up the selection by returning to the starting point only this way would the selection be affected.
For the easy procedure, you can start by selecting portions of the unwanted parts and isolating them one after the other in case of complex image structure. The end goal is to isolate only the intended part of the image.
The cloud at the left part of the tree would first be selected using the magnetic lasso tool as shown below.
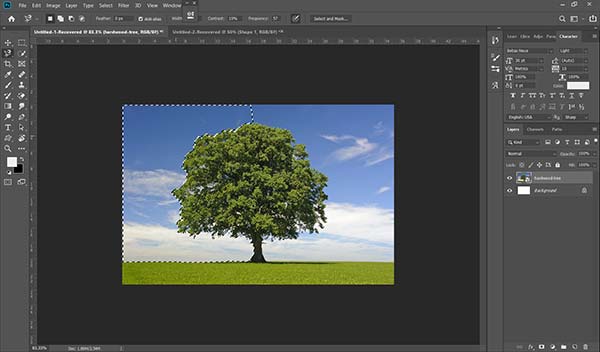
The selection can be seen vividly from the above image. The procedure is repeated for the right part of the tree as well. Note that this process can be done all at once.
Step 3
The process of isolating the selected layer through the layer via cut under the layer menu at the top menu bar is employed. Note that the image has to be rasterized through the aforementioned procedure to make the selection possible.
You can also right-click inside of the selection to affect the layer via cut for this tool instead of going through the top menu.
The isolated parts are then deleted or hidden so that they would remain only the tree and the grass field as seen in the image below.
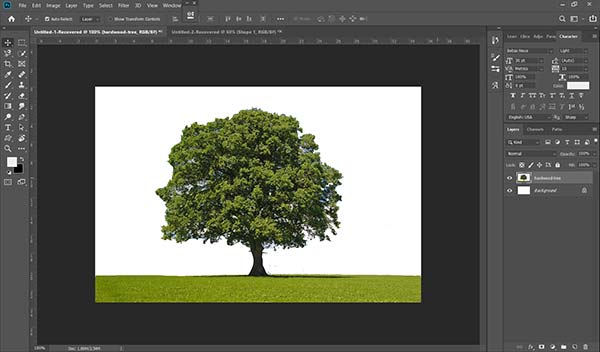
Note that several tools can be used on the same image at the same time. In this case, the color range tool can also be used after using the magnetic lasso tool to remove the little blue cloud that might still be appearing inside of the tree.
The next image shows the transformation of the tree after a new background has been added to it after removing the clouds.
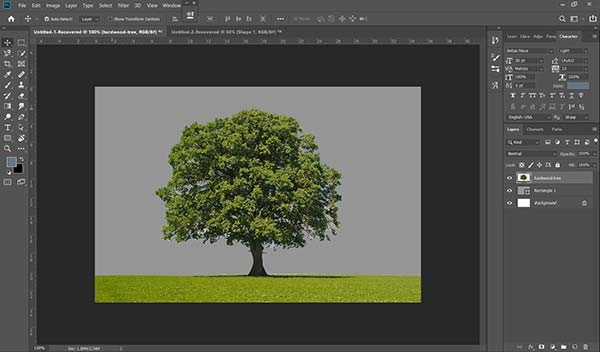
Note that the result of any photography work or image manipulation depends on the choice of the tool to use In performing the task.
